Yoga is a life-changing practice if we understand and practice it well. It can make a huge change in not only our lives but our overall well-being too. It not only includes practicing some physical postures, but it also has a journey inward, where we explore our inner strength and potential, and where lies the practice of Pranayama, the art of breath control.
Table of Contents
- What is Pranayama?
- The Breath-body Connection
- The Power of Bandhas
- The 7 Essential Asanas: Building a Foundation for Pranayama
- 1. Sukhasana (Easy Pose)
- 2. Vajrasana (Diamond Pose)
- 3. Paschimottanasana (Seated Forward Fold)
- 4. Balasana (Child's Pose)
- 5. Vrikshasana (Tree Pose)
- 6. Bhadrasana (Butterfly Pose)
- 7. Savasana (Corpse Pose)
- Deepen Your Practice: Know the Power of Bandhas
- 1. Bandhas: The Energetic Locks
- 2. Unlocking Potential: Mula Bandha and Uddiyana Bandha
- 3. Learning with Guidance and Expertise
- Master Your Breath: One Asana at a Time
What is Pranayama?
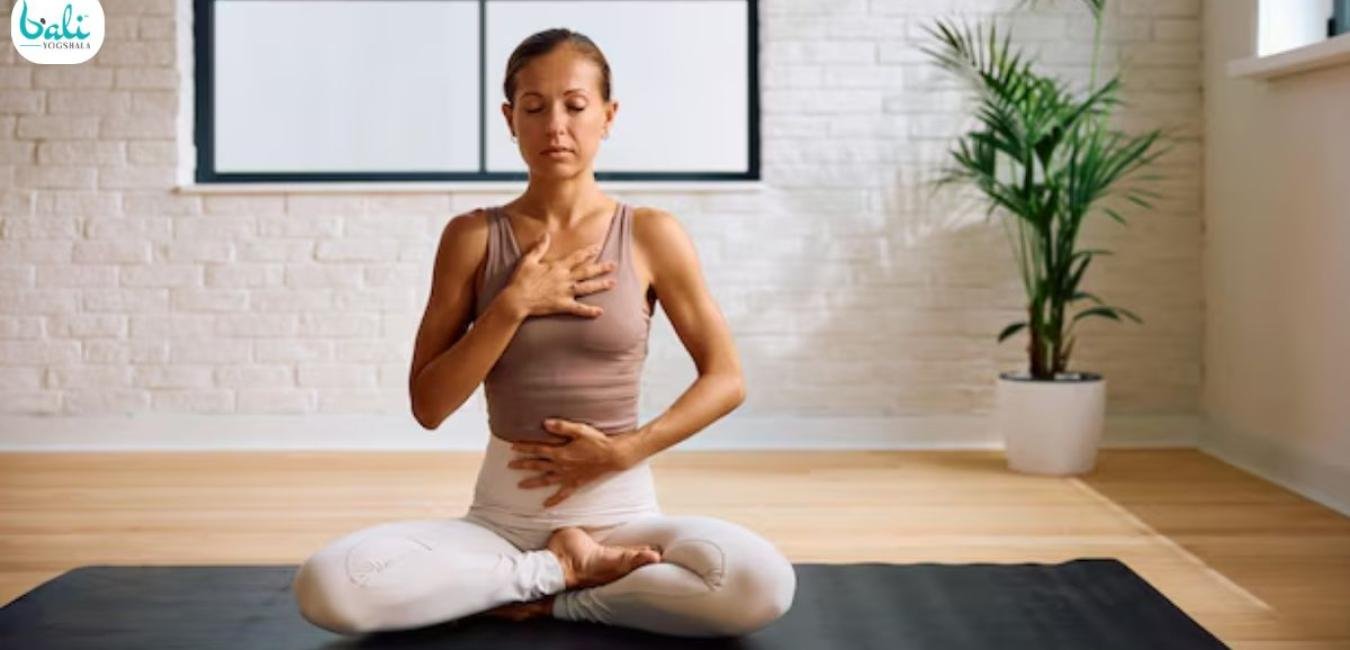
Pranayama is an ancient technique and practice used in yoga, which translates in Sanskrit as "life force (prana) extension (ayama)." It is a practice in which we continuously direct and control our breathing. It believes that breathing directly influences the flow of vital energy within the body.
The Breath-body Connection
Have you ever noticed that whenever something happens in our body, no matter what, we are always told to take a deep breath or control our breathing? Why though? Well, breathing works as a vital bridge between the physical and other subtle aspects of our being. Asana practice, through different techniques and physical postures, prepares our body to control and navigate our breathing more deeply. Pranayama, on the other hand, refines our breathing and influences the nervous system in our body. This helps in not only improving our mental clarity but also letting us have an enhanced yoga experience.
The Power of Bandhas
The energetic locks we have in our body are known as bandhas, and they play a very crucial role in Pranayama practice. If we successfully engage these locks, we can not only direct but also intensify the flow of prana and have the maximum benefits of breath control practices.
The 7 Essential Asanas: Building a Foundation for Pranayama
Now that we know that pranayama is an essential aspect and that its connection with asana practice is crucial to helping us grow in our yoga journey, let's explore and learn in detail about the seven key poses that can help all individuals and aspiring yogis establish a strong base for breath control.
1. Sukhasana (Easy Pose)
Description:- Sukhasana is one of the easiest poses, also known as "crossed leg easy pose," which is practiced in a sitting position.
%20(1)_1774431927.webp)
How to do:-
Just sit comfortably with an erected spine, and keep your knees either slightly staggered or stacked. Rest your hands on your knees or laps and keep the position of your palms facing upwards.
Benefits:-
- Provided a stable base for Pranayama.
- Allows proper alignment of the spine.
- Improves overall body posture.
- Increases body flexibility.
- Provide better digestion and relief from back pain.
Variations:-
Indivifuals who have pain in their knees or tight hips can place a folded blanket under their buttocks for better support. Alternately you can also avoid sitting on the floor and replace it with chair with feet flat on the floor.
2. Vajrasana (Diamond Pose)
Description:- Vajrasana, also known as thunderbold or diamond pose, is a kneeling asana or pose in Hatha yoga.
%20(1)_1774432194.webp)
How to do:-
To practice this pose, you need to kneel down on the floor and keep your toes pointed back in a way so that your buttocks rest on your heels. You need to keep your spine erect and rest your hands on either your thighs or knees.
Benefits:-
- Promotes escellent spine alignment.
- Strengthen the core and leg muscles.
- Enhance the overall stability during the practice.
- Increases the thigh and foot muxcle flexibility.
- Helps in relieving rehumatic pain.
Variations:-
If you find kneeling on the floor uncomfortable, you can sit on a folded blanket to elevate or raise your pelvis. And alternatively, you can also use a chair to practice this pose while keeping your knees bent at 90 degrees and your feet flat on the floor.
3. Paschimottanasana (Seated Forward Fold)
Description:- Paschimottanasana, also known as seated forward bend or intense dorsal stretch, is a bending asana in Hatha yoga.
%20(1)_1774432414.webp)
How to do:-
To do this, you need to sit on the floor with your legs extended in front of you. Fold your body forward with your hips and try to reach your hands towards your toes or shins. Lengthen your spine and keep it long while avoiding hunching your back.
Benefits:-
- Lengthen the spine and create space for deep breathing.
- It calms the mind and promotes relaxation.
- Provides relief from hamstring pain.
- It helps with weight management.
- It increases appetite and improves overall blood flow.
Variations:-
Reaching the toes might be difficult for most people, and for this, you can either use a belt or a yoga strap looped around your feet to assist your body in a forward bend. Shift your focus from forcefully trying to touch your head to your knees to lengthening your spine.
4. Balasana (Child's Pose)
Description:- Balasana, also known as child pose, is a kneeling-down asana practice in yoga.
How to do:-
To practice this pose, kneel down on the floor with your toes together, but keep your knees hip-width apart. Sit back on your heels and rest your forehead on the mat. Lengthen the spine and extend your arms forward in front while keeping your palms facing down.
Benefits:-
- It calms the mind and nervous system.
- Lengthen the spine and open up the hips.
- Relieves tension in the pelvis and relaxes the back muscles.
- Stimulates the digestive system and relieves constipation.
- Increases blood flow in the neck and back of the head.
Variations:-
For pregnant women, to add comfort, you can place a folded blanket between your thighs. People with lower back issues can modify it by either placing a rolled-up towel under their forehead or by sitting on a bolster, as you prefer.
5. Vrikshasana (Tree Pose)
Description:- Vrikshasana, also known as Tree Pose, is one of the very few standing and popular poses in Hatha Yoga.
%20(1)_1774433109.webp)
How to do:-
To practice this pose, begin by standing tall with your feet together. Shift your body weight onto one leg, lift one foot, and place it on your inner thighs, ankles, or calf. Practice based on your flexibility level, keep your hips lifted, and raise your arms overhead with your palms together in a joined namaskar pose.
Benefits:-
- Improves overall balance and focus.
- Strengthen the muscles, core, and leg muscles.
- Improves stability and strengthens the ligaments.
- It helps build focus and relieves sciatica.
- Stabilises the hips and improves body posture.
Variations:-
To find the balance, beginners can use a wall by placing one hand on it for support. You can also rest your lifted foot on the floor beside your standing ankle for add stability to the practice while progressing to placing it on your leg.
6. Bhadrasana (Butterfly Pose)
Description:- Bhadrasana is also known as the butterfly pose or throne pose, which is done while sitting on the mat.
%20(1)_1774433624.webp)
How to do:-
To begin this pose, you need to sit on the floor with the soles of your feet together while pointing your knees outward. Gently press your knees down on the mat towards the floor while holding onto your feet with both hands to keep them attached. Keep your spine erect and engage your core muscles.
Benefits:-
- Opens the hips and groins.
- Releases tension in the lower back and promotes relaxation.
- Increases the flexibility of the legs.
- Improves strength in the backbone, hips, and thighs.
- Helps in relieving varicose veins.
Variations:-
If you feel discomfort while pressing your knees down, you can use a bolster or a folded blanket under your thighs for support. People with the issue of tight hips and pain can also modify the pose by slightly bending their knees.
7. Savasana (Corpse Pose)
Description:- Savasana, also known as Mritasana or a corpse pose, as stated by the name, is a relaxation pose usually used at the end of a session.
%20(1)_1774433845.webp)
How to do:-
Lie flat on the floor with your arms on the sides and your palms facing upwards. Separate your feet and keep your legs extended. Close your eyes, relax your mind, focus on your breathing, and allow your body to completely relax.
Benefits:-
- It helps in calming the central nervous system.
- It calms the mind and helps reduce stress.
- Aids the digestive and immune systems of the body.
- It helps reduce headaches and fatigue.
- It helps lower the blood pressure.
Variations:
People with back pain issues can put their legs on a chair or a wall and can also add a pillow, a rolled-up blanket, or a bolster under their knees or heads for better support.
Read Also:- 200-Hour Yoga Teacher Training in Bali
Deepen Your Practice: Know the Power of Bandhas
After knowing in detail how to perform the foundational asanas with ease, now it's time to go a bit deeper in your practice and know the concept of bandhas.
1. Bandhas: The Energetic Locks
Bandhas are energetic locks within our body that help intensify our Pranayama practice. If we engage these bandhas, we can direct and navigate the flow of vital energy in our body and maximise the benefits of the breath control system.
2. Unlocking Potential: Mula Bandha and Uddiyana Bandha
There are two primary Bandhas that are useful in Pranayama, which are:
- Mula Bandha (Root Lock):- Know this bandha as if you are trying to stop the flow of something downward, for example, urine from the body. It involves the engagement of pelvic floor muscles, creates the basics of stability, and redirects the prana upwards in your body.
- Uddiyana Bandha (Abdominal Lock):- Upward is done; now it's time for inward. For this, you need to take a deep exhale and then suck your stomach in towards your spine as much as you can by lifting your diaphragm. It intensifies the breath and helps draw the prana inward.
3. Learning with Guidance and Expertise
These basic descriptions of the bandhas are just the beginning points of your practice, where you learn and know about them. It's necessary to put the essentiality of practicing them under the guidance of skilled yoga teachers. As an experienced teacher will ensure proper alignment and technique and help you avoid any potential strain on your body while maximising the benefits of practice. And as you progress in the practice, they will also introduce you to more deep and advanced bandhas.
Master Your Breath: One Asana at a Time
We have gone through in detail the connection between asana and pranayama to help you build a solid foundation for your pranayama practice. Keep in mind that pranayama is considered the art of breath control and is also a cornerstone of yoga, and mastering it will require consistent practice. To do so, you will require some comfortable positions, both seated and standing, that are achievable through specific asana practice. This will not only enhance your overall well-being but also offer you an array of benefits, both physically and mentally. You can also further improve the Pranayama practice of Bandhas.
Remember that mastering the Pranayama is a journey to begin with and not a destination to look after. Consistent practice is the only key; you need to regularly practice this asana and know how this will take you towards better health. So, to all the beginners and aspiring yogis, don't just wait; take a deep breath and start your practice now.
Share Post
No Comments Yet